How to Publish Your App
Take your app from design to live. This guide walks you through every step — from the App Builder to submitting for publishing on the App Store and Google Play.
1 The two-step publish flow
Publishing your app in MobiDrag is a guided, two-step process:
- 1App Preview — see your app exactly as your customers will, choose a device, and scan a QR code to test on your real phone.
- 2App Listing — fill in your app's name, description, screenshots, and other metadata required by the App Store and Google Play before submitting.
Before publishing, make sure you have saved your latest design in the App Builder. The preview always reflects your last saved state.
2 Step 1: Click Publish in the App Builder
The green Publish button lives in the top-right corner of the App Builder toolbar. It is always visible while you are designing.
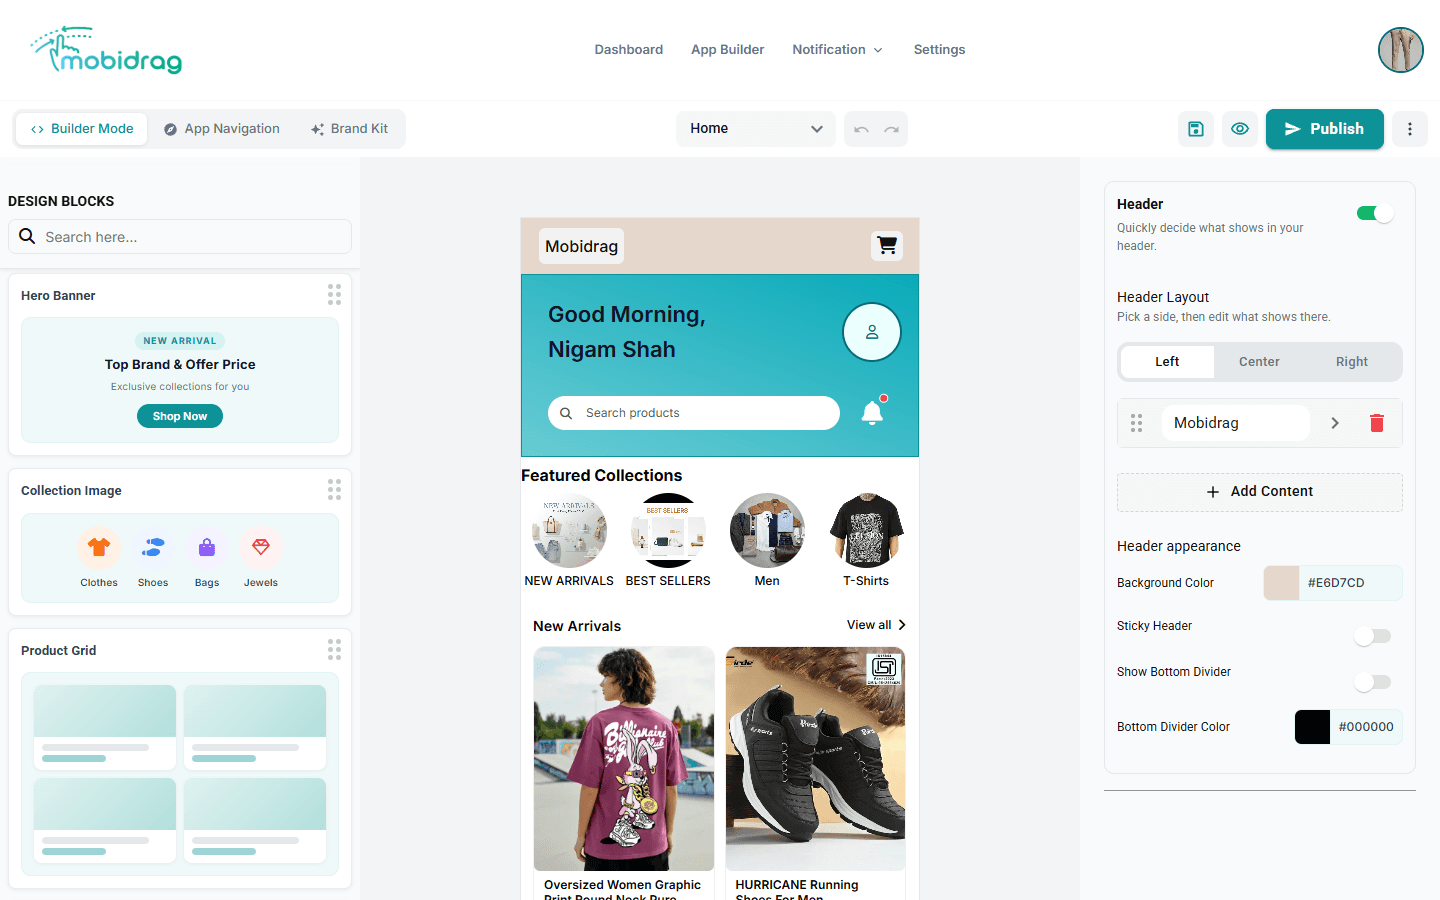
- 1Open the App Builder from the top navigation (App Builder → Builder Mode).
- 2Design and save your app pages.
- 3Click the green Publish button in the top-right corner of the toolbar.
- 4MobiDrag navigates you to the App Preview page automatically.
3 Step 2: Review your app in the Preview page
The App Preview page shows a live phone mockup of your app alongside an information sidebar. Use this page to do a final check before going live.
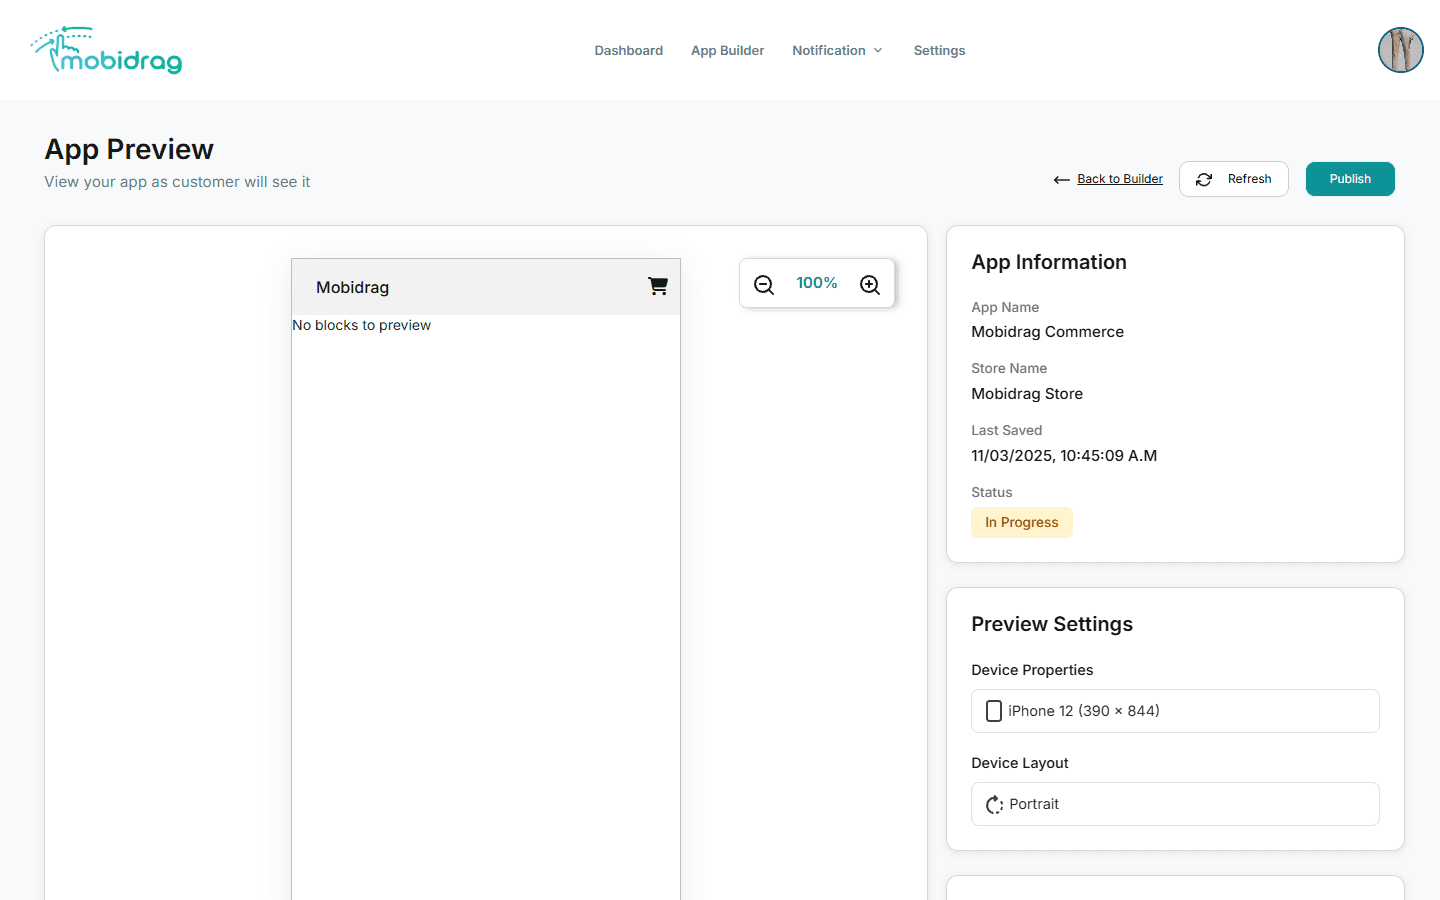
The sidebar shows:
| Section | What it shows |
|---|---|
| App Information | App name, store name, last saved time, and current status badge |
| Preview Settings | Device selector (57 presets) and Device Layout (Portrait / Landscape) |
| Scan to Preview | QR code generator to open the app on your real phone |
Use the Back to Builder link to return and make more changes, or Refresh to reload the latest saved design.
4 Step 3: Complete the App Listing form
When you are happy with the preview, click the teal Publish button at the top-right of the preview page. This opens the App Listing form.
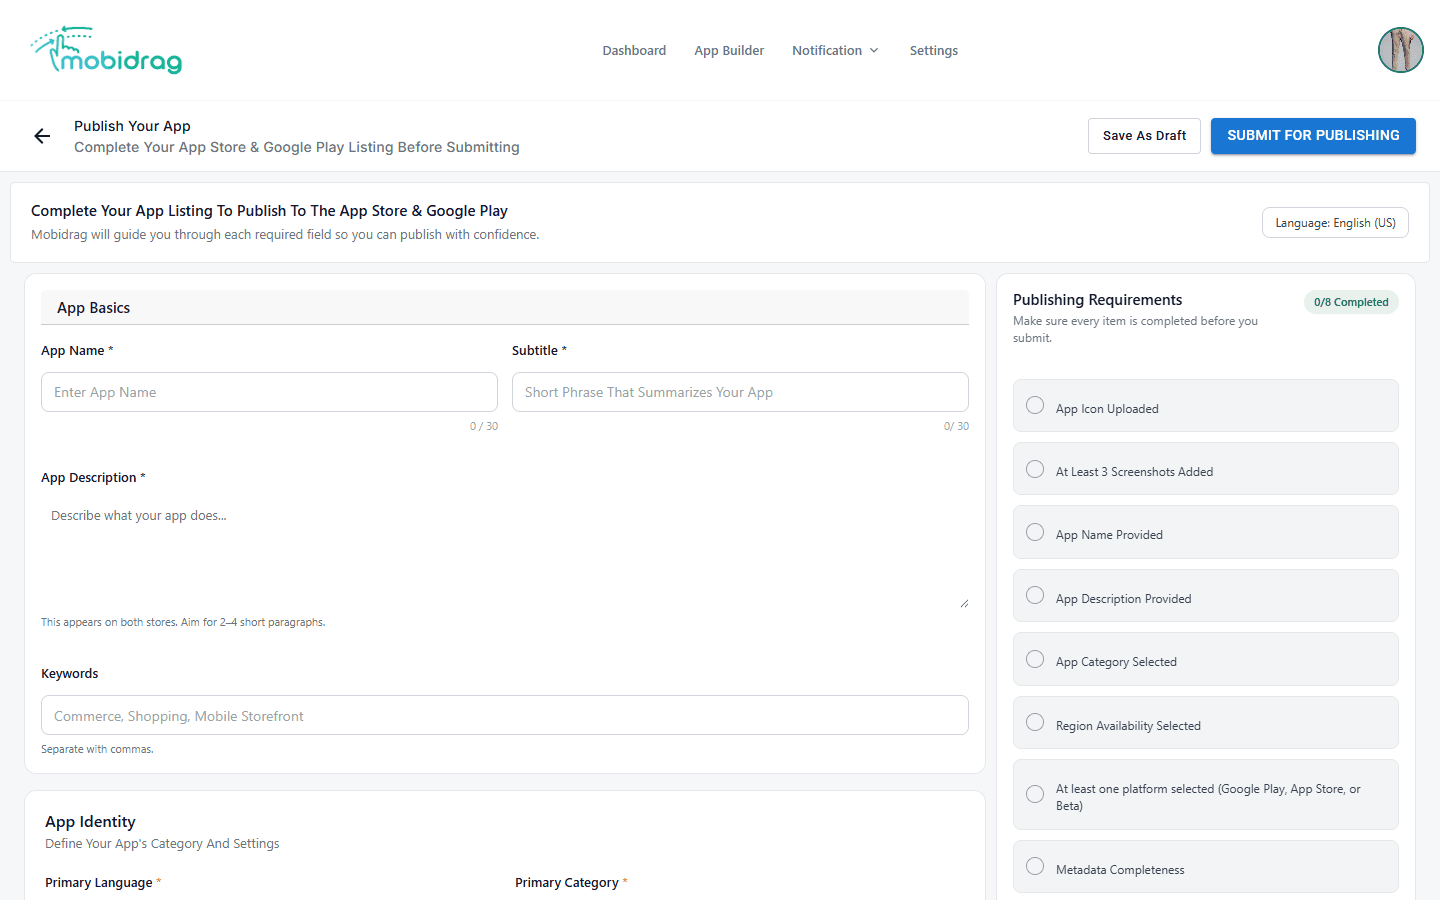
Fill in each section of the form:
- App Basics — App Name (max 30 chars), Subtitle (max 30 chars), App Description, Keywords
- App Identity — Primary Language, Primary Category
- App Icon — Upload a 1024×1024 px square icon (no rounded corners, no transparency)
- App Screenshots — At least 3 screenshots from your app (use the Preview page to capture them)
- Region & Platform — Select which countries and whether to publish on App Store, Google Play, or both
5 The 8 publishing requirements
The right panel of the App Listing form tracks your progress through 8 required items. You cannot submit until all 8 are completed.
The checklist counter updates in real time as you fill in each field. Watch for 0/8 Completed to increment to 8/8 Completed before submitting.
6 Submit for Publishing
Once all 8 requirements are met, click SUBMIT FOR PUBLISHING (top-right of the listing form). MobiDrag will:
- 1Validate your listing metadata one final time.
- 2Queue a build job that compiles your React Native app bundle.
- 3Send your app to the App Store and/or Google Play review queue.
- 4Email you when the build is complete and the review is underway.
You can also click Save As Draft at any time to save your listing details without triggering a build — useful if you want to finish the form in multiple sessions.
App Store and Google Play reviews typically take 1–3 business days. Do not submit a new build while a review is in progress, as it will reset the queue.